Sunday, December 31, 2017

Mail - North Pole Express...

This is the card I made for my parents mail carrier. I pulled out the Post & Parcel kit - I really wish I would use this more often!

I placed a piece of Soft Stone pattern paper on a white cardstock card base. To create the mailbox, I die-cut Pure Poppy cardstock and put it together with scor-tape. I made a couple of score lines on the left and right side and used pearlescent texture paste and a stencil for the word Mail. North Pole Express is stamped in black ink. I added a piece of grey/white/red pattern paper for the mailbox top.

There's a postcard in the mailbox slot - it's die-cut with a postage die and stamped with Pure Poppy, Seattle and black ink. I carefully put it in the slot and added the lock, die-cut in True Black cardstock. The lock and the hole at the top both have Stone twine on them.

After I placed the mailbox on the card, there was too much space at the bottom so I added the ribbon and bow, die-cut in Pure Poppy cardstock. It's hard to see in the picture, but the ribbon is textured with stripes. 


The "postcard" in the slot:

Card Details:
  • Stamps:  PTI Post & Parcel, Postmarks
  • Paper:  PTI White Stampers Select, Pure Poppy, True Black, Post & Parcel, Holiday Plaid
  • Ink:  PTI Pure Poppy; Amuse Seattle; Versafine Onyx Black
  • Dies:  PTI Post & Parcel, Simple Bow
  • Other:  Pearlescent Embossing Paste; Twine; Foam Tape
  • Size:  5.0" x 7.0"

Saturday, December 30, 2017

I Hope Santa Spoils You Rotten (#5)...

And finally the last of the Santa's Elves cards!!

On white cardstock, I sponged on a little bit of Lemon Tart ink for the background so the card didn't look so white. I stamped the sentiment in black ink and added a strip of Tropical Teal stripes.

Everything was die-cut in white cardstock and colored with Copic markers. I added glitter to the elf's hat and cuff and pink chalk to his cheeks before placing him on foam tape for dimension. The bells and the purple present are also on foam tape.

I really had a lot of fun making all 5 cards!

Card Details:
  • Stamps:  MFT Santa's Elves
  • Paper:  PTI White Stampers Select, Tropical Teal Stripes
  • Ink:  PTI Lemon Tart; Memento Tuxedo Black
  • Copics:  BG15, BG49, C3, E30, E33, G24, R24, Y35, YG67, V15 
  • Other:  Foam Tape; Glitter; Chalk
  • Size:  4.25" x 5.5"

Friday, December 29, 2017

Deck The Halls...

Heather Nichols always uses Kraft cardstock for her projects and I really like the look of it. I'm trying to use it more often....sometimes it works for me, sometimes not.

I started with a piece of Kraft cardstock and stamped the branches in Olive Twist and Prairie Grass inks. I stamped the sentiment and added a bunch of white paint splatters to make it look like it's snowing.

The ornaments are die-cut in Scarlet Jewel cardstock 3 times. I stamped the image on one in Versamark ink, sprinkled it with white embossing powder and melted it. I placed them on the panel and added the stitched string and bows.

The panel is adhered to an Olive Twist cardstock card base.

Card Details:
  • Stamps:  PTI What The Doodle: Ornament, Holiday Greens, Love Lives Here: Holiday, Tiny Tags II
  • Paper:  PTI Olive Twist, Scarlet Jewel, Kraft
  • Ink:  PTI Olive Twist, Prairie Grass, Scarlet Jewel; Versamark
  • Dies:  PTI What The Doodle: Ornament
  • Tools:  Heat Tool
  • Other:  Zing Embossing Powder; White Paint
  • Size:  4.25" x 5.5"

Thursday, December 28, 2017

This Is A Time Of Love & Cheer...

I was still making last minute cards right up until Christmas! I need to plan better for next year.😊

This card started with a white cardstock case base layered with a piece of Scarlet Jewel cardstock, embossed with stripes. For the sentiment, I cut a rectangle of white cardstock, stamped it in Olive Twist ink and backed it with gold foil paper. I placed it on fun foam for dimension.

The greens, berries and pinecones were all die-cut in white cardstock. I stamped the greens in Spring Moss, Ripe Avocado, Olive Twist and Simply Chartreuse, the berries in Scarlet Jewel and Pure Poppy and the pinecone in Cocoa Bean. A couple of the greens are on foam tape for dimension.

I added a little bit of glitter to the greens and tied gold shimmer twine around it. 

Card Details:
  • Stamps:  PTI Holiday Greens, Stylish Sentiments: Holiday
  • Paper:  PTI White Stampers Select, Scarlet Jewel; Gold Foil
  • Ink:  PTI Spring Moss, Ripe Avocado, Olive Twist, Simply Chartreuse, Scarlet Jewel, Pure Poppy, Cocoa Bean
  • Dies:  PTI Holiday Greens
  • Other:  Darice Stripes Embossing Folder; Glitter; Fun Foam; Foam Tape; Twine
  • Size:  5.0" x 7.0"

Wednesday, December 27, 2017

I Hope Santa Spoils You Rotten (#4)...

We're almost done with the Santa's Elves cards! I can't take credit for this design, I saw it on Susan's Blue Fog Studio Blog and thought it was so cute! I changed mine just a little from the one she made.

I took a piece of white cardstock, ran it through the Cuttlebug with a woodgrain impression plate and adhered it to a Hawaiian Shores cardstock card base. The elf and the ornaments were die-cut in white cardstock, stamped with black ink and colored with Copic markers. I added pink chalk to his cheeks and glitter on his hat and cuffs.

I used lilac twine to hang the ornaments and placed them and the elf on foam tape for dimension. I made a little mark with a white gel pen on the ornaments to give them a shiny look. The sentiment was stamped in black ink on a piece of Pure Poppy cardstock.

Card Details:
  • Stamps:  MFT Santa's Elves
  • Paper:  PTI White Stampers Select, Hawaiian Shores, Pure Poppy
  • Ink:  Memento Tuxedo Black
  • Copics:  BG15, C3, E30, E33, R24, T1, V9, V15
  • Dies:  MFT Santa's Elves; PTI Woodgrain Impression Plate
  • Other:  Foam Tape; Twine; Chalk; Gel Pen; Glitter
  • Size:  4.25" x 5.5"

Tuesday, December 26, 2017

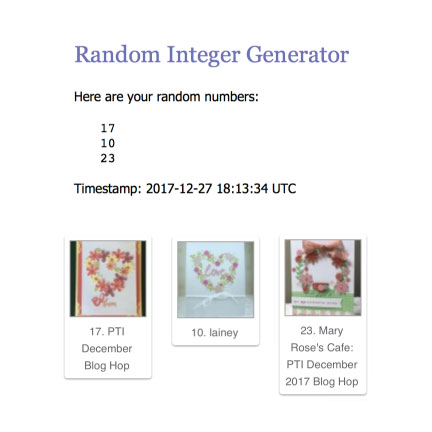
Papertrey December 2017 Blog Hop...


I really didn't have time to make a card for the blog hop, and was hoping it would be something holiday related since I'm still in holiday mode. But it looks like they picked "love" to go along with their latest release of Valentine items.


Since it was a heart shaped wreath, I immediately thought of the To Have And To Hold stamp set. I stamped the wreath in Spring Moss ink, adding additional leaves in Spring Moss and Simply Chartreuse inks.

The flowers were die-cut in white cardstock and stamped in Raspberry Fizz and Pale Peony inks. I added a few smaller flowers in Berry Sorbet ink. Love was die-cut in Pale Peony cardstock using a die from the Wet Paint set.

I scored three lines 1/2" apart at the bottom (hard to see in the picture), tied white crochet thread in a bow and added glitter to the flowers. That's the best I could do during this busy time of year!

Card Details:
  • Stamps:  PTI To Have And To Hold
  • Paper:  PTI White Stampers Select
  • Ink:  PTI Spring Moss, Simply Chartreuse, Raspberry Fizz, Berry Sorbet, Pale Peony
  • Dies:  PTI Wet Paint
  • Other:  Crochet Thread; Scor-Pal; Glitter
  • Size:  4.25" x 5.5"

__________________________________________________________________________________


⭐⭐Guess what? I won for this entry! Thank you PTI!⭐⭐

12/27/17 - From the Papertrey Blog:
We were all winners of a $25 gift certificate!

Monday, December 25, 2017

There's No Place Like Home...

This is the card I sent out to family and friends this year. I wanted to make something simple that didn't involve a lot of die-cutting and would be flat enough to mail.

The card base was made with the Noted Scalloped A2 Collection with white cardstock. I cut a rectangle of Pure Poppy cardstock for the next layer.

On a stitched oval, I stamped the house in Smokey Shadow ink. The trees were stamped twice, once in Smokey Shadow and once in gray ink. I added the sentiment, stamping it in black and red inks.

I added a coarse glitter to the trees to make them look like they had snow on them. 

Card Details:
  • Stamps:  Altenew Winter Cottage, Pine Tree; PTI Home For The Holidays
  • Paper:  PTI White Stampers Select, Pure Poppy
  • Ink:  PTI Smokey Shadow, Pure Poppy; Versafine Onyx Black; Memento Gray Flannel
  • Dies:  PTI Noted: Scalloped A2 Die Collection
  • Other:  Martha Stewart Coarse Glitter
  • Size:  4.25" x 5.5"

Sunday, December 24, 2017

Faux Stained Glass (MIM #307)...


I really didn't think I'd have time to play with this week's Make It Monday #307: Faux Stained Glass hosted by Laurie Schmidlin. But I'm waiting for my traditional Date & Nut Bread to come out of the oven and thought I'd make a quick card. And I couldn't believe how quick and easy this technique is!

I used white cardstock to die-cut Cover Plate: Twist and backed it with a piece of vellum. Using Copic markers, I filled in the sections with two different colors, alternating the colors for each row. I adhered the vellum panel to a white cardstock card base. I didn't use any type of dimensional because I wasn't sure fun foam would work with this Cover Plate since the foam tends to stretch when run through a die-cutting machine.

For the sentiment I die-cut a circle in Tropical Teal and one in white, with the sentiment stamped in black ink. I placed it on foam tape for dimension. That's it! I wish all my cards were this fast to make....and extra points because I really like the look of it too! Now I'm off to take my bread out of the oven - the house smells wonderful!!!

Merry Christmas everyone!

Card Details:
  • Stamps:  PTI Winter Hills
  • Paper:  PTI White Stampers Select, Tropical Teal; Vellum
  • Ink:  Versafine Onyx Black
  • Copics:  BG13, BG49
  • Dies:  PTI Cover Plate: Twist, Limitless Layers: Circles
  • Other:  Foam Tape
  • Size:  4.25" x 5.5"

Merry Christmas...

I'm so glad I was in a "cutesy" stamp mode this season because I'm in love with all these cutesy stamps from MFT!

This is an ornament tag I haven't used before and die-cut the window tag in Fresh Snow Linen cardstock and the backer in Soft Stone cardstock. The bear is die-cut in white cardstock, stamped in black ink and colored with Copic markers. I added a little bit of pink chalk to give both bears rosy cheeks.

Merry Christmas is stamped in black ink. I used Type Strips/Bit to create the name and placed it on a piece of Lovely Lady cardstock and on fun foam for dimension. The snowflakes are die-cut in white cardstock and have a clear sequin in the middle. I finished the tag by adding Blossom twine for the tie.

The tag closed:


The inside of the tag: (the to/from is on the back of the tag)

Project Details:
  • Stamps:  MFT Polar Bear Pals; PTI Keep It Simple: Christmas, Type Strips II
  • Paper:  PTI Fresh Snow Linen, White Stampers Select, Soft Stone, Lovely Lady
  • Ink:  Memento Tuxedo Black
  • Copics:  R81, R83, W1
  • Dies:  PTI Basic Cut Tag, Window Cut Tag, Type Bits Strip; MFT Polar Bear Pals, Snowflake Splendor
  • Other:  Twine; Sequins; Chalk
  • Size:  3.0" x 3.25"

Saturday, December 23, 2017

Oh Deer Christmas Is Here...

Can you take seeing another card with this cute set?

I used white cardstock for the card base and stenciled the clouds with Hawaiian Shores ink. I made the snowdrifts using a snowdrift die, adding a glitter line along them. The tree was die-cut in white cardstock and colored with a Copic marker.

The animals and birds were die-cut in white cardstock, the image stamped in black ink and colored with Copics. To create the spots on the deer, I used a colorless blender to take off some of the brown ink. I placed each of them on foam tape for dimension, adding a gem to the hats.

Card Details:
  • Stamps:  MFT Dashing Deer
  • Paper:  PTI White Stampers Select
  • Ink:  PTI Hawaiian Shores; Memento Tuxedo Black; Versafine Onyx Black
  • Copics:  BG15, E31, E33, E35, E42, R20, R27, W1, W3, 0
  • Dies:  MFT Dashing Deer, Snowdrifts; Memory Box Tall Birch
  • Other:  MFT Mini Cloud Edges Stencil; Glitter; Gems; Foam Tape
  • Size:  4.25" x 5.5"

Friday, December 22, 2017

I Hope Santa Spoils You Rotten (#3)...

Did I mention how much fun this set is to create things with?

I started by taking a piece of white cardstock and stenciling the background with a brick wall, using a soft grey color ink. I picked the little elf that's sitting down, die-cut him in white cardstock, stamped the image in black ink and colored him with Copic markers.

I added the rug, die-cut in Hawaiian Shores cardstock and the presents, both die-cut in white cardstock and colored with Copics. The sentiment is stamped in black ink. I placed the completed panel on a Pure Poppy cardstock card base. The elf and gifts are on foam tape. I added glitter to the hat and his little cuffs and pink chalk to his cheeks and ears.

There was too much space at the top and I ended up die-cutting and coloring holly leaves to place across the card. I placed each of them on foam tape for dimension.

Card Details:
  • Stamps:  MFT Santa's Elves, Merry Christmoose
  • Paper:  PTI White Stampers Select, Pure Poppy, Hawaiian Shores
  • Ink:  PTI Soft Stone; Memento Tuxedo Black
  • Copics:  C3, BG15, BG49, E23, E30, G24, R24, R29, T1 
  • Dies:  MFT Santa's Elves, Merry Christmoose
  • Other:  Foam Tape; Glitter; MFT English Brick Wall Stencil; Chalk
  • Size:  4.25" x 5.5"

Thursday, December 21, 2017

Peace On Earth Tag...

Here's another fun tag I made using the deer from Dash Away All. 

I used Tag Sale #10 and die-cut it in Dark Indigo and Kraft cardstock. On the blue tag, I stamped the snow in white ink. The deer is die-cut in Kraft cardstock and edged with Kraft ink. I added the sentiment and nose in Cocoa Bean ink.

The banner is die-cut in Pure Poppy cardstock using the die from Tag Sale: Quilted and is on fun foam for dimension. I added the name using Type Strip/Bits. Dark brown twine was used for the tag tie.

Project Details:
  • Stamps:  PTI Dash Away All, Type Strips II
  • Paper:  PTI Kraft, Dark Indigo, Pure Poppy, White Stampers Select
  • Ink:  PTI Cocoa Bean, Kraft, Fresh Snow; Memento Tuxedo Black
  • Dies:  PTI Tag Sale #10, Dash Away All, Tag Sale: Quilted, Type Bits Strip
  • Other:  Twine; Fun Foam
  • Size:  3.0" x 3-5/8"

Wednesday, December 20, 2017

Christmas Greetings...

I never thought I'd enjoy making shaker cards as much as I do now because MFT has made it so easy to do with their shaker pouches!

I started by sponging Blueberry Sky ink on a panel of white cardstock and die-cut the opening for the shaker pouch. On the piece that was die-cut, I added the house, trees and snowdrift die-cuts. This kit is amazing with the details! I added glitter to the snow on the roof and the snowdrift. I also drew a white line with a gel pen on the trees - I saw one of the MFT Design Team do this and I liked the look of it.

I placed confetti, sequins and glitter in the shaker pouch and attached it to the Blueberry Sky cardstock card base. My next step was placing the white panel (that had the shaker die-cut from it) over the pouch and securing it to the card base. Confused? You really need to watch the video on the MFT website to see how to do this and it'll all make sense.

I added a couple snowdrifts to the card, making sure the top one lined up perfectly with the snowdrift in the shaker. I stamped the sentiment in Blueberry Sky ink. A few more trees and some maraschino twine finished the card. Love the way this one turned out!

Card Details:
  • Stamps:  MFT Snow Globe Kit
  • Paper:  PTI Blueberry Sky, White Stampers Select, Pure Poppy, Ripe Avocado, Spring Moss, Spring Rain
  • Ink:  PTI Blueberry Sky
  • Dies:  MFT Snow Globe Kit; PTI In The Meadow
  • Other:  Twine; Glitter; Shaker Pouch
  • Size:  4.25" x 5.5"

Tuesday, December 19, 2017

Jingle All The Way Repeat...

And here's the last of the repeating sentiment cards I made.

I added a layer of green and scarlet colored pattern paper on top of a white cardstock card base. On a panel of white cardstock, I stamped the sentiment in two different colors of ink - Scarlet Jewel and Ripe Avocado, which match the pattern paper. Again, the Misti was a big help with this!

The bell is die-cut in white cardstock, stamped with black ink and colored with Copic markers. I placed it on foam tape and added a silver star to the middle. Quick and easy cards to make!

Card Details:
  • Stamps:  PTI Tremendous Treats: Christmas; MFT Jingle All The Way
  • Paper:  PTI White Stampers Select, Holiday Cheer
  • Ink:  PTI Scarlet Jewel, Ripe Avocado; Memento Tuxedo Black
  • Copics:  C3, N4, R59, YG95
  • Dies:  PTI Tremendous Treats: Christmas
  • Other:  Foam Tape; Metal Star
  • Size:  4.25" x 5.5"

Monday, December 18, 2017

I Hope Santa Spoils You Rotten (#2)...

Onto card #2! I could make endless cards with this set!

On white cardstock, I created the snowdrifts with a stencil and blue ink. For the sky, I really rubbed on a lot of blue ink to make it look like a daytime sky. With another stencil, I spread on pearlescent embossing paste to create the snow.

The elf and penguin are die-cut in white cardstock and colored with Copic markers. I placed each of them on foam tape and added a pompom to the penguin's hat. To add a little more fun, I added glitter to the rim of the elf's hat and pink chalk to his cheeks and ears. The sentiment was stamped in black ink and the panel adhered to a Dark Indigo cardstock card base. 

Card Details:
  • Stamps:  MFT Santa's Elves, Polar Pals
  • Paper:  PTI White Stampers Select, Dark Indigo
  • Ink:  Memento Bahama Blue, Tuxedo Black
  • Copics:  B2, B5, C3, E30, G24, R24, R29, Y35, YG67, 100
  • Dies:  MFT Santa's Elves, Polar Pals
  • Tools:  MFT Drifts & Hills Stencil; Simon Says Stamp Falling Snow Stencil
  • Other:  Pompom; Glitter; Foam Tape; Embossing Paste; Chalk
  • Size:  4.25" x 5.5" 

Sunday, December 17, 2017

Wishing You A Magical Holiday...

I got the idea of putting three reindeer together from Laurie Schmidlin - she posted the cutest card on her blog in October when the Dash Away All set was released.

For my card, I started with a piece of white cardstock, stamped the snow in Versamark ink, sprinkled on white embossing powder and heat set it. Next, I took Spring Rain and Blueberry Sky inks and sponged them over top of the embossed snow.

I die-cut the three deer in Kraft cardstock and edged around them with white ink. I tied brown twine around their necks to connect them together, adding brown noses to two deer and a red gem for Rudolph, leading the pack. The deer are on foam tape for dimension.

The banner is die-cut in Spring Rain cardstock and the sentiment stamped in Blueberry Sky ink. I placed the panel on a Dark Indigo cardstock card base.

Card Details:
  • Stamps:  PTI Dash Away All
  • Paper:  PTI Dark Indigo, Spring Rain, Kraft, White Stampers Select
  • Ink:  PTI Blueberry Sky, Spring Rain, Fresh Snow, Cocoa Bean; Versamark
  • Dies:  PTI Dash Away All, Tag Sale: Quilted
  • Tools:  Heat Tool
  • Other:  Twine; Gem; Foam Tape; Recollections Embossing Powder
  • Size:  4.25" x 5.5"

Saturday, December 16, 2017

Peace...

Every year I make a special Hanukkah card for someone I used to work with. He said he keeps them and includes them in his decorations each year.

I started with a piece of white cardstock and scored it on the diagonal every half inch. I placed the panel on a Dark Indigo cardstock card base.

The star, which is actually two parts, is die-cut in Dark Indigo three times and stacked together. I placed it on a Blueberry Sky circle, adhering fun foam to the back to give it some dimension. I added a small silver ball to each of the star points.

Peace is die-cut once in silver sparkle cardstock and twice in white cardstock and stacked together. This silver paper is gorgeous!

Card Details:
  • Paper:  PTI White Stampers Select, Blueberry Sky, Dark Indigo; MFT Silver Sparkle
  • Dies:  PTI Menorah Medley, Wet Paint Holiday
  • Tools:  Scor-Pal
  • Other:  Fun Foam; Silver Balls
  • Size:  4.25" x 5.5"

Friday, December 15, 2017

I Hope Santa Spoils You Rotten (#1)

A friend asked me to make him cards using this elf and sentiment for his grandchildren. So here's the first one of five. I got this idea from Joy Taylor who is on the MFT Design Team.

I took a piece of white cardstock and ran it through the Cuttlebug with a wonky stitched rectangle. Next, I stamped the tree in black ink and colored it with Copic markers. I made a mask of the tree and sponged on Peacock Feathers ink around the tree, adding Harvest Gold ink around the star to make it look like it's glowing.

The elf is die-cut in white cardstock, stamped with black ink and colored with Copics. I added some chalk to his cheeks, glitter to the trim around his hat and shirt and placed him on foam tape for dimension. I stamped the sentiment in black ink and added the little bell on foam tape which was die-cut in white cardstock and colored with Copics.

The panel was placed on a white cardstock card base with a layer of blue and white diagonal striped paper. The blue in the paper matches the color in his shirt perfectly!

Card Details:
  • Stamps:  MFT Santa's Elves
  • Paper:  PTI White Stampers Select; Recollections
  • Ink:  PTI Harvest Gold; Memento Tuxedo Black; Tim Holtz Peacock Feathers
  • Copics:  BG15, BG49, C3, E23, E25, E30, G24, R24, R29, V15, Y11, YG67
  • Dies:  MFT Santa's Elves, Wonky Stitched Rectangles
  • Other:  Foam Tape; Glitter; Chalk
  • Size:  4.25" x 5.5"

Thursday, December 14, 2017

Papertrey December 2017 Create Along With Us...


Well, I guess I need to wear my glasses more because I thought this adorable card by Betsy Veldman was a snowman when I first looked at it! 😀 Anyway, it inspired me to get out my Shape Up Snowman die. And with all the pink I'm seeing for Valentine's Day, I knew I needed to include it on my card.


I started with a white cardstock card base and added a layer of pink snowflake paper with a nice snowdrift at the bottom complete with glitter along the edge.

The snowman is die-cut in white cardstock. I stamped the eyes, mouth, nose, buttons and sentiment in black ink, and colored the nose with a Copic marker.  I sponged on a little bit of pink chalk for his cheeks. The hat is made with Hawaiian Shores and Pure Poppy cardstock.

I die-cut the "huggable" arms in Dark Chocolate cardstock and the mittens in Pure Poppy cardstock. Merry is die-cut in Hawaiian Shores and placed so it looks like the snowman is holding it. My last step was adding the coordinating ribbon for the scarf. 

Card Details:
  • Stamps:  PTI Shape Up Snowman Accessories, Stylish Sentiments: Holiday
  • Paper:  PTI White Stampers Select, Hawaiian Shores, Pure Poppy, Dark Chocolate; Recollections Christmas
  • Ink:  Memento Tuxedo Black
  • Copics:  Y38
  • Dies:  PTI Shape Up Snowman, Wonderful Words: Holiday; MFT Snowdrifts
  • Other:  Glitter; Stampin' Up Bermuda Bay Ribbon; Chalk
  • Size:  4.25" x 5.5"

Wednesday, December 13, 2017

You're On The Nice List...

I'm having a lot of fun making tags this year using MFT stamps. So cute for any age!

I die-cut the tag in Kraft cardstock and stenciled the lines in Pure Poppy ink.  Santa is die-cut in white cardstock and colored with Copic markers. I placed him on foam tape, adding glitter to his beard and hat trim.

The banner is die-cut in white cardstock and stamped with black ink. I die-cut a back tag in Pure Poppy, used red thread for the tie and placed a pompom on his hat.

Project Details:
  • Stamps:  MFT Jingle All The Way
  • Paper:  PTI White Stampers Select, Pure Poppy, Kraft
  • Ink:  PTI Pure Poppy; Memento Tuxedo Black
  • Copics:  100, E21, E42, N4, R29
  • Dies:  PTI Tag Sale #10; MFT Jingle All The Way; Tag Trio Nestabilities
  • Tools:  PTI Modern Background Stencil
  • Other:  Glitter; Foam Tape; Pompom; Thread
  • Size:  2.75" x 3.75"

Tuesday, December 12, 2017

Let It Snow...

I've been making a bunch of tags and decided to personalize them. I think it'll be fun to see if the recipients notice their name on the tag. Probably not...they'll most likely rip the paper off and throw it in the trash!!😮 Guess who'll be fishing the tags out of the trash?😎

I die-cut the tag in Spring Rain and Blueberry Sky cardstock. I used a stencil and white ink for the snow and added a snowdrift in white cardstock at the bottom with my usual glitter line. The bear is die-cut in white cardstock, stamped in black ink and colored with Copic Markers. I placed him on foam tape for dimension and added some pink chalk for his rosy cheeks.

I stamped out the name, placed it on an Enchanted Evening banner and added denim twine for the tie.

Project Details:
  • Stamps:  MFT Polar Bear Pals, Snow Globe Kit; PTI Type Strips II
  • Paper:  PTI Spring Rain, Blueberry Sky, Enchanted Evening, White Stampers Select
  • Ink:  PTI Blueberry Sky; Memento Tuxedo Black; Colorbox Frost White
  • Dies:  PTI Tag Sale #10, Type Bits Strip, Stemmed Statement; MFT Polar Bear Pals;
  • Copics:  B21, B34, T1
  • Tools:  Simon Says Stamp Falling Snow Stencil
  • Other:  Twine; Glitter; Foam Tape; Chalk
  • Size:  2.5" x 3.75"

Monday, December 11, 2017

Merry Christmas...

I like the look of these circle sentiments and it takes the guessing out of which sentiment to use!

On a white cardstock card base, I stamped little snowflakes in Soft Stone ink and added a strip of Blueberry Sky polka dot paper down the side.

For the snowman scene, I used a circle of Soft Stone cardstock for the background and added two trees die-cut in Spring Moss and Ripe Avocado cardstock. Next, I added a snowdrift in white cardstock, complete with a glitter line.

The snowman is die-cut in white cardstock 3 times and stacked together. I added the eyes, buttons and arms in Smokey Shadow cardstock, the nose in Orange Zest and the scarf using a scrap of Pure Poppy Bitty Blocks.

The Merry Christmas circle is die-cut in Blueberry Sky cardstock and placed on top of the entire scene, which is on fun foam for dimension.

Card Details:
  • Stamps:  PTI Winter Penguin
  • Paper:  PTI Blueberry Sky, White Stampers Select, Spring Moss, Ripe Avocado, True Black, Orange Zest, Soft Stone, Blueberry Sky Bitty Dots, Pure Poppy Bitty Boxes, Smokey Shadow
  • Ink:  PTI Soft Stone
  • Dies:  MFT Snow Globe Kit, Merry Christmas Circle Frame
  • Other:  Glitter; Fun Foam
  • Size:  4.25" x 5.5"

Sunday, December 10, 2017

Rudolph The Red Nosed Reindeer...

Another quick card for today. I copied this idea from one of the PTI Design Team - but I don't remember which one.😳

On white cardstock I stamped the names of the reindeer in Pure Poppy ink at the bottom. The top is snow stamped in Aqua Mist ink. I placed this panel on a white cardstock card base adding a layer of red and white polka paper.

The deer is die-cut in Cocoa Bean cardstock and edged with Cocoa Bean ink. I placed it on foam tape and added a red gem for the nose.

Card Details:
  • Stamps:  PTI Dash Away All
  • Paper:  PTI White Stampers Select, Cocoa Bean; Recollections
  • Ink:  PTI Pure Poppy, Aqua Mist, Cocoa Bean
  • Dies:  PTI Dash Away All
  • Other:  Foam Tape; Gem
  • Size:  4.25" x 5.5"

Saturday, December 9, 2017

Merry Christmas...

I had an extra cute bear sitting around and thought I'd make a quick card with it.

I created the sky by rubbing Hawaiian Shores ink on a piece of white cardstock. I added the snowflakes, die-cut in white cardstock.

The bear was die-cut in white cardstock and his scarf colored with Copics. I just bought Speech Bubbles and die-cut this one in white cardstock and stamped the sentiment in black ink.

The panel is on a Hawaiian Shores cardstock card base. I added clear sequins to the snowflake centers to complete the card.

Card Details:
  • Stamps:  MFT Polar Bear Pals, Snow Globe Sentiments
  • Paper:  PTI White Stampers Select, Hawaiian Shores
  • Ink:  PTI Hawaiian Shores; Memento Tuxedo Black
  • Copics:  BG23, RV17, W1
  • Dies:  MFT Polar Bear Pals, Speech Bubbles, Snowflake Spendor
  • Other:  Sequins
  • Size:  4.25" x 5.5"

Friday, December 8, 2017

Believe...

Sometimes tags take just as much time to make as a card!

I used Tag Sale #4 and die-cut it in Kraft and Pure Poppy cardstock. On a stitched circle die-cut in Dark Indigo cardstock, I stamped the snow in white ink. The circle is on fun foam for dimension.

The deer is die-cut in white cardstock four times and stacked together with the top one colored with Copic markers. I die-cut the banner in Pure Poppy cardstock, stamped "believe" in Versamark, sprinkled it with white embossing powder and heat set it.

I added snowflakes die-cut in white cardstock, adding clear sequins to the middle and maraschino twine for the tie.

Project Details:
  • Stamps:  PTI Holiday Button Bits; MFT Dashing Deer; Altenew Snowing
  • Paper:  PTI Pure Poppy, White Stampers Select, Kraft, Dark Indigo
  • Ink:  Memento Tuxedo Black; Color Box Frost White; Versamark
  • Dies:  PTI Tag Sale #4, Stemmed Statements; MFT Dashing Deer; Lil Inker Designs Stitched Circles
  • Copics:  E33, E35, E42, R22, R27
  • Tools:  Heat Tool; EK Success Snowflake Punch
  • Other:  Twine; Embossing Powder; Sequins; Fun Foam
  • Size:  3.0" x 3.5"

Wednesday, December 6, 2017

Easy Fan Brush Trees (MIM #306)...


This week it's Betsy Veldman who shows us how to make trees using a fan brush in this video ↪ Make It Monday #306: Easy Fan Brush Trees. Well, what's easy for one person (with talent!) is not necessarily easy for another person (without talent!) 😃 Betsy sure made it look simple to make these trees, but when I tried it, it didn't go so well. I used quite a few pieces of watercolor paper before I sort of got the hang of it. I also think having a good fan brush helps; the fan brush I used must have been from a cheap pack of brushes because it didn't really hold it's shape very well.

Anyway...for my card I started with a piece of watercolor paper and applied Spring Moss, Simply Chartreuse and a touch of Ripe Avocado inks to create the trees. After it was dry, using a make-up brush, I brushed on Spring Rain and Blueberry Sky inks for the sky.

It's a little hard to see in the picture, but I flicked on a bunch of white paint to create a snowy scene. The horse and sleigh are die-cut in Enchanted Evening cardstock and on foam tape for dimension. I stamped the sentiment on a separate piece of watercolor paper, attached it to the panel and adhered it to a white cardstock card base.

Card Details:
  • Stamps:  PTI In The Meadow
  • Paper:  PTI Enchanted Evening; 140# Watercolor
  • Ink:  PTI Spring Moss, Simply Chartreuse, Ripe Avocado, Enchanted Evening, Spring Rain, Blueberry Sky.
  • Dies:  PTI In The Meadow
  • Other:  Fan Brush; Foam Tape; White Paint
  • Size:  4.25" x 5.5"

Monday, December 4, 2017

Joy To The World...

Here's another one of the cards I made using the Dashing Deer set and I'm still hooked on using this snow drift stencil!

On white cardstock, using a stencil, I created the snow drifts with Blueberry Sky ink. The sky was made by rubbing it with Spring Rain and Blueberry Sky inks. Next, I took a snow stencil and spread pearlescent embossing paste on it. I really like the shiny look it gives.

The animals were die-cut in white cardstock and colored with Copic markers. Each of them is placed on foam tape for dimension. I added the spots on the deer with a white gel pen. The sentiment is stamped in black ink and the panel adhered to a Blueberry Sky cardstock card base.

I thought a little sprig would be a nice addition above the sentiment and die-cut it in white cardstock, colored it with Copics and placed it on foam tape.

Card Details:
  • Stamps: MFT Dashing Deer; PTI Ways To Say: Merry Christmas
  • Paper:  PTI Blueberry Sky, White Stampers Select
  • Ink:  PTI Blueberry Sky, Spring Rain; Versafine Onyx Black
  • Copics:  B95, BG13, E35, E42, G24, N4, R24, R29, V15, W1, W3
  • Dies:  MFT Dashing Deer
  • Tools:  MFT Drifts & Hills Stencil; Simon Says Stamp Falling Snow Stencil
  • Other:  Pearlescent Embossing Powder; Foam Tape; Gel Pen
  • Size:  4.25" x 5.5"

Saturday, December 2, 2017

Merry Christmas Repeat...

Here's another one of my repeating sentiments like I did in my November 12, 2017 post.

I used a white cardstock card base and added a snowflake pattern paper from Christmas prints. I cut a rectangle in Pure Poppy cardstock and one slighter smaller in white cardstock.

Using the MISTI, I stamped the sentiment 9 times in Pure Poppy ink and once in black ink. I attached both panels to the card base.

The snowflake is die-cut 4 times, 3 times in white cardstock and once in silver foil cardstock. I placed it on the card and added some white fun fur around the top. Remember snow = fun fur! 😀

Card Details:
  • Stamps:  PTI Keep It Simple: Merry Christmas
  • Paper:  PTI Christmas Prints, Pure Poppy, White Stampers Select; DCWV Foil
  • Ink:  PTI Pure Poppy; Memento Tuxedo Black
  • Dies:  Lil Inker Designs Stitched Snowflakes
  • Tools:  MISTI
  • Other:  Fun Fur
  • Size:  4.25" x 5.5"

Thursday, November 30, 2017

Love Of Layers (MIM #305)...


Another week and another challenge! And it's the end of November!! 😳This week Laurie Schmidlin is the host and shows us how to use lots of layers on projects. You can watch her video here ↝ Make It Monday #305: Love Of Layers.

I decided to make a tag for this challenge and started by die-cutting Tag Sale: Quilted in a pattern paper, backed by white cardstock for a bit more support. I also die-cut the tag in Pure Poppy cardstock to use as a backer for the tag which has "to & from" stamped on it.

I cut a 3"x3" square of Pinefeather cardstock, backed it with fun foam and placed it inside the stitching on the tag. The stitched circle is die-cut in white cardstock, the sentiment stamped in Pure Poppy ink and placed on foam tape for additional dimension. The holly leaves are die-cut in white cardstock, stamped with Green Parakeet, New Leaf and Pure Poppy inks and backed with foam tape for even more dimension! It is fun making these multi-level dimensional projects! I added Pure Poppy twill ribbon for the tag tie.

I'm counting 6 layers on this tag: 1) the Pure Poppy back, 2) white cardstock backing the pattern paper, 3) pattern paper, 4) Pinefeather cardstock, 5) white cardstock, 6) holly leaves.😊


Project Details:
  • Stamps:  PTI Seasons Greetings, Christmas Critters
  • Paper:  PTI Christmas Prints, Pinefeather, Pure Poppy, White Stampers Select
  • Ink:  PTI Pure Poppy, Green Parakeet, New Leaf
  • Dies:  PTI Tag Sale: Quilted, Christmas Critters; Lil Inker Designs Stitched Mats: Circles
  • Other:  PTI Pure Poppy Twill Ribbon; Fun Foam; Foam Tape
  • Size:  3.75" x 4.0"

Tuesday, November 28, 2017

Happy Holidays...

Sometimes I get tired of using the same old Christmas traditional colors. How about something from the pink family?

On a piece of white cardstock with a stitched border, I stamped the tree in Versamark, sprinkled it with silver embossing powder and heat set it. I stamped the ornaments, star, exterior dots and sentiment in Hibiscus Burst ink. The tree stand is stamped in grey ink.

I placed the panel on a stitched/scalloped card base made with Hibiscus Burst cardstock.

Card Details:
  • Stamps:  PTI O'Tannenbaum, Keep It Simple: Happy Holidays
  • Paper:  PTI Hibiscus Burst, White Stampers Select
  • Ink:  PTI Hibiscus Burst; Versamark; Versafine Smokey Gray
  • Dies:  PTI Noted: A2 Scalloped Vertical
  • Tools:  Heat Tool
  • Other:  Embossing Powder
  • Size:  4.25" x 5.5"

Sunday, November 26, 2017

Sending Christmas Joy & Cheer...

I wanted to make another snow globe card, this time using a night sky.

I started with a piece of white cardstock and die-cut the snow globe opening. In Dark Indigo cardstock, I die-cut the snow globe shape and stamped the snowflakes in Versamark ink. I sprinkled them with white embossing powder, heat set it and placed it into the white opening.

The snowman is die-cut in white cardstock with additions in True Black, Raspberry Fizz, Cocoa Bean and Orange Zest cardstock. Some of those dies are so tiny to cut! I placed the snowman, along with the trees on the night sky, adding a snowdrift with a glitter line in front. To make it look more like a snow globe, I added a strip of cherry wood paper along the bottom. 

I stamped the sentiment in dark blue, adhered the panel to a Dark Indigo cardstock card base and tied pink sorbet twine around it. These snow globes are so much fun to make! 

Card Details:
  • Stamps:  MFT Snow Globe Kit; PTI Stylish Sentiments: Holiday; Altenew Snowing
  • Paper:  PTI White Stampers Select, Dark Indigo, Raspberry Fizz, Ripe Avocado, Spring Moss, Cocoa Bean, Orange Zest, True Black; MFT Cherry Wood
  • Ink:  Versamagic Night Sky; Versamark
  • Dies:  MFT Snow Globe Kit
  • Tools:  Heat Tool
  • Other:  Embossing Powder; Twine; Glitter
  • Size:  4.25" x 5.5"

Saturday, November 25, 2017

Papertrey November 2017 Blog Hop Challenge...


Just one month until Christmas...yikes!!! This month the blog hop inspiration photo focuses on Fall and the lovely colors and adornments that go along with it. It didn't take long for me to come up with an idea for my card (yea!).


I pulled out Color Pop Autumn for this card - I'm so happy I'm getting a lot of use out of this kit! On Fresh Snow Linen paper, I stamped the leaves, berries and acorns in a variety of Fall like colors, just like in the picture. I placed the panel on a white cardstock card base and added a strip of Orange Zest stripes down the side.

The sentiment is stamped on a stitched rectangle in Cocoa Bean ink and is on fun foam for dimension.

Card Details:
  • Stamps:  PTI Color Pop: Autumn, Autumn Hills
  • Paper:  PTI Fresh Snow Linen, White Stampers Select, Orange Zest Stripes
  • Ink:  PTI Pure Poppy, Scarlet Jewel, Spring Moss, Ripe Avocado, Summer Sunrise, Fine Linen, Cocoa Bean; Memento Morocco
  • Dies:  Lil Inker Designs Stitched Mats: Rectangles
  • Other:  Fun Foam
  • Size:  4.25" x 5.5"